
Why we use the Web view loading progress bar?
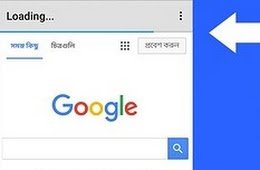
The progress is bar use to display a progress bar when the WebView loads the main link and internal links of a website and hide progress bar when the page is completely loaded.

To make progress bar until your website or Webview opens on your app for thunkable, makeroid, app inventor, appy build and etc.
- Material required for the progress bar
- One Horizontal arrangement
- One label component
- Webviewer
- Extended Webviewer Extension (version 2) (download from here)
- and just little concentration 😉
Guide to display the progress bar when web view-loads a URL or page is opening
- Label Component part:
- Set Screen Align Horizontal to Left 1.
- Add Label to Screen.
- Set value of Label Height percentage recommended: 1, Width: Fill parent
- Set Text Alignment to left 0.
- Delete Text from Label.
- Change the background color on Label (Any random color you want).
Web viewer Component part:
Set web viewer height & width to fill a parent or according to you.
Add the link to the web viewer.
Upload the Extended Webviewer Extension and add it to the screen.
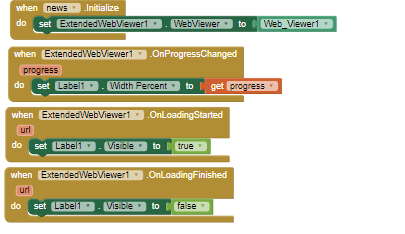
The designer part is successfully completed. Now Blocks Building Part Left which is not too complicated just see the image of the block below.
If you have any doubts or query comment down below.
1 thought on “How to Make Web-view loading Progress bar | Thunkable”