
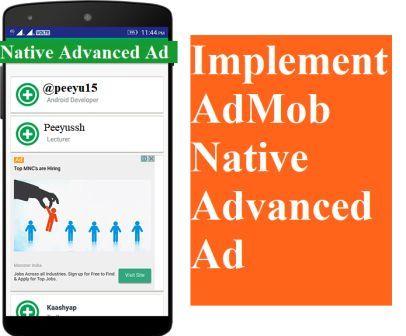
What are AdMob Native ads Advance (unified) AdMob Native ads Advance is a new ad format that matches the style and function of the platform in which the Native ads Advanced appears to users through user interface components that are native to the platforms.
AdMob Native Ads Advanced using Android Studio
AdMob native ad provides independence to a developer to customize the ad style such as choosing fonts, colors, and other details, headlines, and calls to action buttons like Visit Ad. Using this new ad format we can design native ad presentations that can provide a rich user experience.
Integrating AdMob Native ad advance in App using Android Studio
Before we start Integrating Admob native ads. Firstly integrate the latest Google Mobile Ads SDK into the app. Follow these steps to Integrate:
Precondition
- Android Studio version 3.2 or more
- compileSdkVersion 28 or more
- minSdkVersion 15 or more
Importing Mobile Ads SDK to Gradle dependency
- Open Gradle Script> build.gradle (project-level)
Add Following dependencies in classpath:
dependencies {
classpath 'com.android.tools.build:gradle:3.4.2'
classpath 'com.google.gms:google-services:4.3.0' //add this
}
allprojects {
repositories {
google() <--Add this if not present in directive-->
jcenter()
}
}- Again open Gradle Script> build.gradle (module:app)
Add: In the dependencies section
dependencies {
.....
implementation 'androidx.appcompat:appcompat:1.0.2'
implementation 'com.google.android.material:material:1.0.0'
implementation
'androidx.vectordrawable:vectordrawable:1.0.1'
implementation 'com.google.android.gms:play-services-ads:18.1.1'
........
}- Update AndroidManifest.xml file
<application>
<meta-data
android:name="com.google.android.gms.ads.APPLICATION_ID"
android:value="www.Imhypee.xyz"/> <---replace "www.Imhypee.xyz" with your Admob App ID--->
</application>- Before loading ads, the app should initialize the Mobile Ads SDK
Add: The Following code which includes import statement, initialize() method in the Main Activity which is necessary for the app to initialize the Mobile Ads SDK by calling MobileAds.initialize().
package ...
import com.google.android.gms.ads.MobileAds;
import com.google.android.gms.ads.initialization.InitializationStatus;
import com.google.android.gms.ads.initialization.OnInitializationCompleteListener;

public class MainActivity extends AppCompatActivity {
protected void onCreate(Bundle savedInstanceState) {
super.onCreate(savedInstanceState);
setContentView(R.layout.activity_main);
MobileAds.initialize(this, new OnInitializationCompleteListener() {
@Override
public void onInitializationComplete(InitializationStatus initializationStatus) {
}
});
}
}- Sync your Project with Gradle Files
The Mobile Ads SDK is now Successfully imported and now check out part 2 to for complete implement Native Ads Advanced (Unified) in your app.
This is Part 1 Basic tutorial for integrating – Admob Native Ads Advanced (Unified) in Android Studio for beginners. Click Here AdMob Native ads Advance for Part 2 which includes Complete – Admob Native Ads Advanced (Unified) tutorial.
Note: Always use sample ad units and sample app id to avoid invalid traffic Get Test Ad.
1 thought on “Tutorial Admob Native Ads Advanced (Unified) Android Studio”